Google is the best and widely used website all over the internet. The reason behind its fame is undoubtedly its high-performance value, outstanding user-friendly features, and interactive user interface.
This platform provides its users a vast amount of information from numerous sources in the market. Moreover, even the best websites have some unavoidable issues. Network problems, bugs, cookies, coding errors, etc. are some of the issues that users encounter.
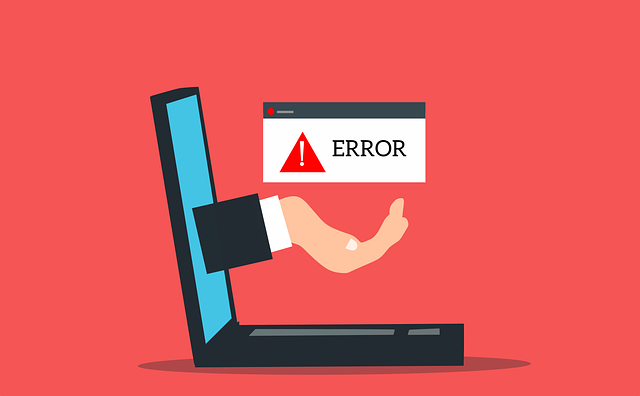
The ERR_QUIC_PROTOCOL_ERROR is an error that prevents the users of Google Chrome from efficiently taking advantage of the features of the browsers. This error often leads to pop-ups like ‘The webpage is not available’, ‘temporarily down’, and ‘permanently moved on to new web address.
This error is related to the ‘Quick UDP Internet Connections’ that is the Quic protocol featured by Google Chrome. It improves and enhances the browsing experience and online gaming graphics.
Read Also:
- ERR_CONNECTION_TIMED_OUT
- System Thread Exception Not Handled
- Ethernet Doesn’t Have a Valid IP Configuration
Reasons behind the ERR_QUIC_PROTOCOL_ERROR
As specified above the major reason is behind this error is Quic. This error can also be caused because of the third-party extensions installed on your computer. These reasons occur in the majority of cases that cause trouble in browsing data.
How to fix ERR_QUIC_PROTOCOL_ERROR in Chrome?
In this article we have discussed some of rhe best and effective solutions to fix the error ERR_QUIC_PROTOCOL_ERROR on Chrome Browser. So let’s get started to find out them.
Fix 1: Using the Chrome://flags Command
Step 1: Firstly, navigate to the browser (i.e. Chrome) and switch to new tab.
Step 2: Secondly, type “chrome://flags” in the address bar, and hit Enter.
Step 3: You will receive a notification pop-up addressing, “Careful; these experiments may bite” which put forth the warning about seeking such “experimental features”. Irrespectively, this procedure is pretty safe and the warning can be cold-shouldered.
Step 4: Next locate the feature, Experimental Quic protocol by pressing CTRL+F on the keyboard as it will make the find box pop-out.
Step 5: Finally, when it is located, from the drop-down menu select Disabled and then relaunch the Chrome Browser. This should eradicate the error.
Fix 2: Disabling Browser Extensions
Third-party browser extensions usually offer a customized web surfing experience and augment the browser functionality. These extensions may cause issues like ERR_QUIC_PROTOCOL_ERROR.
This may occur with unknown extensions and hence you can try disabling them. You can follow the steps given below:
Step 1: Firstly, launch the Chrome browser.
Step 2: Secondly, type “chrome://extensions” in the address bar and hit on Enter.
Step 3: After the Page opens click the toggles on the available extensions to disable them.
Step 4: Next, relaunch the browser and check whether the issue vanished. Even after this, if it doesn’t work get back to the “chrome://extensions” and enable the extensions you trust. This way, you can find out the one causing the error.
Step 5: If simply disabling it doesn’t work you should prefer deleting them completely.
Fix 3: Resetting the Browser
Resetting the Chrome browser can fix this error. But your search engine settings, homepage, and pinned tabs will be cleared. Moreover, bookmarks, saved passwords and history will be safe and will remain intact.
All browser extensions will be disabled and temporary files will be cleared, cookies, and cache data inclusive. Follow the steps given below to reset the browser settings –
Step 1: Launch the Chrome browser.
Step 2: Select the settings by clicking on the Menu icon in the top-right corner of the browser screen.
Step 3: Scroll down to the end of the page and expand the ‘Advanced’ drop-down menu.
Step 4: Scroll down to the bottom and under ‘Rest and Clean’ click on ‘restore settings to the default ones’.
Step 5: After which click on the Reset settings button to confirm this action.
Step 6: Relaunch Chrome and check whether the error is rectified.
Fix 4: Checking the Proxy or Firewall Settings
If the above options don’t work try checking the proxy or firewall settings. This may help you solve the problem.
To do this follow the steps below –
Step 1: Press Windows+ R key on the keyboard and this will direct you to the Internet properties section.
Step 2: Furthermore, type in the command “inetcpl.cpl”. You can also make this work by navigating the control panel in the Start or Cortana bar on your computer. Select “Internet Options” or “network and internet” options respectively.
Step 3: After the command prompt, click on the “Connection” option and choose LAN settings. Keep in mind that there should be no errors with the proxy or firewall. If so fix them prior to the operation.
Step 4: Next, you need to uncheck the box near “use a proxy server for your LAN” option. Then, check the “automatically detect” option.
Step 5: Lastly, click on “OK” and “apply”. Now, restart your computer.
Fix 5: Temporarily Disabling the Firewall
The incoming and outgoing network traffic is monitored and controlled by the Windows Firewall. It keeps your computer from external malicious software and unauthorized users from accessing your personal data.
Hence you can try disabling Windows Firewall temporarily and see if it works by following the steps given below:
Step 1: Bring up the Run dialogue box by pressing the Windows key+ R key on the keyboard.
Step 2: Type Control panel the dialogue box and click Enter.
Step 3: In the pop-up window that opens, select the category in the ‘View by’ drop-down menu in the top right corner of the screen.
Step 4: Click on System and Security then select the Windows firewall.
Step 5: On the left-hand side of the screen click on ‘tun windows firewall(not recommended)’ and press Enter to save changes.
Step 6: Now try visiting the website again and if still the error exists enable all the firewall settings back to normal.
Fix 6: Disable VPN
Few internet service providers differentiate user accounts by displaying a login prompt window asking for your user name and password in order to access the internet. You can also try disabling the VPN while logging into your user account.
Follow the steps given –
Step 1: First of all, click on the Start menu and select Settings.
Step 2: Click Network and Internet and then select proxy.
Step 3: Turn on the “automatically detect settings” by clicking on the toggle.
Step 4: Get back to Network and Internet and Click on VPN.
Step 5: Select the connection that you wish to remove and click the Remove button in order to confirm.
Fix 7: Scan for Viruses
Viruses present in your Computer can cause trouble in effectively utilizing your browser. Thus giving rise to the above error. Follow the given steps to keep your computer safe from foreign agents like Viruses.
Step 1: At first, search for ‘Microsoft security essentials’ in the search field and click on Microsoft Security Essentials.
Step 2: Choose full to scan your computer thoroughly in the pop-up window.
Step 3: Choose the ‘scan now’ option and complete the scan.
Lastly, see that you are free from this error now.
Fix 8: Downloading Software
The software named as Reimage Plus is effective in scanning and replacing corrupt files. Thus you can apply it in the case of system corruption.
Read Also:
- Driver Power State Failure
- There Was a Problem Resetting Your PC
- io.netty.channel.AbstractChannel$AnnotatedConnectException
Conclusion
This error generally arises from the general mode as it doesn’t pop-up in incognito mode. This article provides you numerous ways to tackle this problem and even after this it doesn’t work then you must prefer complaining to the Google Chrome assistant.


