When enabled, secure boot restricts startup execution to predefined, trusted software. This protocol stops malware rootkits and other unwanted programmes from automatically starting with the operating system.
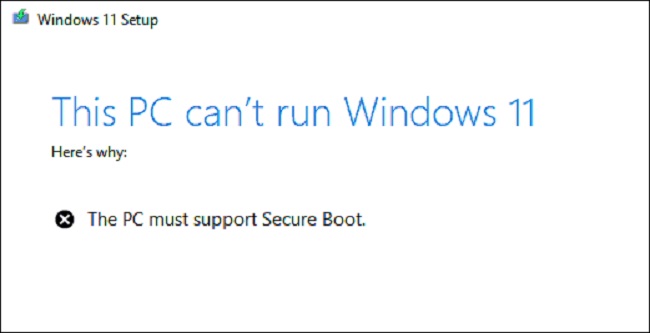
As part of the UEFI (Unified Extensible Firmware Interface) or BIOS need for Windows 11 installation, this function is required for the installation of the most recent operating systems.
It’s not required for consumer versions of Windows (like Windows 10 IoT 2021 LTSC), but it is for business-critical manufacturing software.
Understanding Windows 11 Secure Boot
Defining Windows 11 Secure Boot
Windows 11 Secure Boot is a security feature integrated into the Windows 11 operating system. It plays a pivotal role in protecting your computer from malicious software, rootkits, and other unauthorized code that may attempt to compromise your system’s integrity during the boot process.
Secure Boot ensures that only trusted and digitally signed software components, such as the operating system and hardware drivers, are loaded into memory during the boot-up sequence. This verification process helps prevent the execution of unsigned or potentially harmful code, enhancing the overall security of your PC.
Read Also:
- How Much Space Does Windows 10 Take Up
- There Was A Problem Starting C Windows System32 Logilda DLL
- Windows Could Not Start The Windows Audio Service on Local Computer
What is The Purpose of Secure Boot, And How Does It Function?
Secure Boot functions at boot time since it is a protocol within the UEFI BIOS. This complements the Trusted Platform Module (TPM) that must be present before installing Windows 11.
In conclusion, Trusted Platform Module 2.0 (TPM 2.0) is a hardware-based security tool that offers supplementary data protection beyond what is possible with software-based security. This procedure stops the computer from starting up if malicious software or modified hardware is detected during the boot process.
Secure boot adds another degree of safety to your data by launching only verified and digitally signed software. We will be examining three primary databases: the Signature Database (DB), the Revoked Signature Database (DBX), and the Key Enrollment Database (KEK).
Database (DB) of Signatures – The public keys and certificates of trusted firmware components, OS bootloaders like Microsoft’s OS loader, UEFI applications, and UEFI drivers can be found in the signature database.
Database of Cancelled Signatures (DBX) – To keep your system safe, the revoked signature database stores hashes of known harmful and vulnerable components, keys, and certificates.
Platform Key (PK) – With the platform key, the BIOS firmware can be trusted by the system owner, allowing only authorised users access to the KEK Database.
Key Exchange Key (KEK)– In order to build confidence between the OS and the firmware, a “key-exchange key” database is used. When making changes to the whitelist database or the revoked signature database, the KEK’s list of public keys can be checked. Multiple KEKs can exist on a single platform.
What Makes It A Good Fit For Use at The Cutting Edge of Industry, And Why Should You Care?
Given the worldwide increase in cyberattacks, it is essential that businesses take all necessary measures to protect their sensitive information. Microsoft, Advanced Micro Devices (AMD), and Intel are just a few examples of the leading IT firms that have created proprietary approaches to strengthening security against malware.
To meet the criteria of Windows 11’s Secure Boot and Trusted Platform Module 2.0, Microsoft released Windows 11, and industry leaders Intel and AMD respectively built their own firmware TPM implementations (fTPM).
TPM is an obsolete component that was once widely used by businesses handling sensitive information. Due to the rise in the frequency and sophistication of cyberattacks, TPM 2.0 is now standard on most computers used in the industrial edge.
Exactly How Does TPM 2.0 Differ From Secure Boot?
When activated in the UEFI BIOS, secure boot is a straightforward preemptive safeguard. Secure boot’s job is to prevent any unauthorised software from running at boot time by requiring digital signatures and validation before any code can be executed.
Some examples of such components are a compatible operating system and any other startup apps, such as anti-malware software. However, TPM 2.0 serves as a safe that stores and encrypts the data-sensitive cryptographic keys and certificates required to launch the system.
The TPM will prevent the computer from booting further if it detects a different hard drive or an unlicensed version of the operating system. Secure Boot functions as a security gatekeeper, permitting entry only to verified boot-up software.
The Disadvantages of Secure Boot Are:
When trying to boot illegal software, like a different operating system or dual-booting, Secure Boot might be a little annoyance. Though you’ll need to disable Secure Boot before beginning a dual-boot, you may rest easy knowing Ubuntu is compatible with Secure Boot in dual-boot setups.
Secure Boot can be disabled for a dual-boot arrangement, however it may be activated again after a fresh Ubuntu installation. This minor drawback should not persuade you to give up the security and advantages of Secure Boot.
Secure Boot: How to Enable It in Windows 11?
Let’s start by seeing if secure boot is even an option. In Windows, type’msinfo32′ into the search bar and then look for the “Secure Boot State” option. If the switch is in the ON position, secure boot is activated.
If the UEFI BIOS displays “OFF,” then the feature can be activated. To learn how to enable Secure Boot in the UEFI BIOS, consult your motherboard’s instructions. Verify once more that secure boot is turned on.
If you need to disable Secure Boot, you can do so in the UEFI BIOS. Though it’s not required, you should keep Secure Boot enabled as doing so has no noticeable impact on performance or compatibility.
Secure Boot is unnecessary if the user does not install any malicious software or a rootkit infection.
The Significance of Windows 11 Secure Boot
Elevating Security Standards
- Protection Against Malware: Secure Boot acts as a barrier against malware and rootkits that attempt to inject themselves into the boot process. This protection ensures that your system starts with a clean and trusted foundation.
- Preventing Unauthorized Changes: It prevents unauthorized modifications to essential boot files and the system kernel. This makes it significantly more challenging for attackers to compromise the core components of your operating system.
- Hardware and Firmware Integrity: Secure Boot also extends its security to the hardware and firmware level. It ensures that only genuine and unaltered hardware components and firmware are used during system initialization.
Guarding Against Bootkit Attacks
Bootkits are a type of malware that targets the bootloader, the code responsible for loading the operating system. These malicious programs aim to replace or manipulate the bootloader to gain control over the system. Windows 11 Secure Boot effectively thwarts bootkit attacks by allowing only digitally signed and trusted bootloaders to run.
Safeguarding the Boot Process
Secure Boot ensures that the boot process is tamper-proof, protecting your computer from various threats that can compromise system integrity. By verifying the authenticity of bootloader components, it establishes a chain of trust that extends to the operating system and all the way to user-mode applications.
Enabling and Managing Secure Boot
System Requirements
To take advantage of Windows 11 Secure Boot, your PC must meet specific hardware and firmware requirements:
- Unified Extensible Firmware Interface (UEFI): Secure Boot is a UEFI-based feature. Therefore, your computer’s firmware must be UEFI rather than the older BIOS.
- Secure Boot-Capable Hardware: The motherboard and other hardware components must support Secure Boot.
Enabling Secure Boot
- Access UEFI/BIOS Settings: Restart your computer and access the UEFI/BIOS settings by pressing the designated key during startup (usually F2, F12, or Delete).
- Navigate to Secure Boot: Locate the “Secure Boot” option in the UEFI/BIOS settings. This may be under a “Security” or “Boot” section.
- Enable Secure Boot: Select “Enable” for the Secure Boot option. Save your changes and exit the UEFI/BIOS settings.
- Install Signed Operating System: To take full advantage of Secure Boot, ensure that you install a digitally signed and trusted operating system, such as Windows 11.
Read Also:
Conclusion
Windows 11 Secure Boot is a pivotal security feature that significantly enhances the protection of your PC against malware, bootkit attacks, and unauthorized system modifications.
By enforcing the use of trusted and digitally signed components during the boot process, it establishes a robust security foundation for your operating system. It is crucial to enable and manage Secure Boot on compatible hardware to fully utilize this security measure and enjoy a safer computing experience in the modern digital age.
With Secure Boot, you can have peace of mind knowing that your PC’s boot process is fortified against potential threats, providing a secure environment for your work and entertainment.


