You’re probably here because those rundll32.exe programmes are eating up too much of your hard drive space and central processing unit (CPU). If you’ve used Windows for a while, you might have observed that the number of background processes using the.dll file extension is in the millions.
Dynamic Link Library is what the DLL suffix indicates. They’re utilised to save certain shared app logic that can then be accessed by other apps.
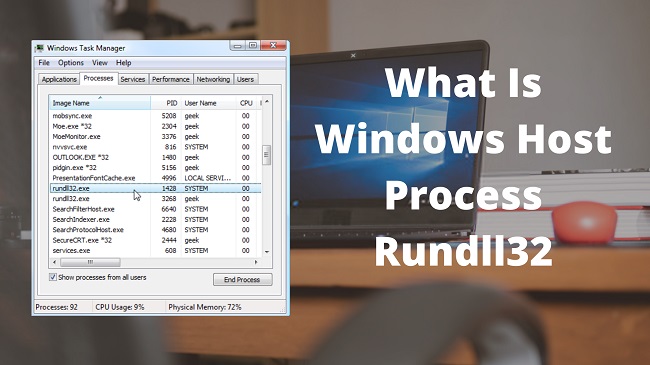
Understanding the Windows Host Process RUNDLL32
Deciphering the Name
The term “RUNDLL32” stands for “Run Dynamic Link Library 32-bit.” It is a crucial component of the Windows operating system responsible for executing dynamic link libraries (DLLs).
DLLs are collections of functions and code that can be used by multiple programs simultaneously, enhancing efficiency and reducing redundancy in the Windows environment.
The Role of RUNDLL32
RUNDLL32 serves as a bridge between DLLs and executable programs, allowing applications to access the functions contained within DLLs. It plays a vital role in launching, controlling, and managing DLL-based functions.
When you encounter RUNDLL32-related issues, it typically indicates a problem with the execution or management of DLLs within your system.
Read Also:
Potential Causes of Windows Host Process RUNDLL32 Issues
Malware and Virus Infections
- Malware Infiltration: Malicious software can tamper with the RUNDLL32 process, leading to abnormal behavior or errors. Malware may replace legitimate DLLs with malicious versions, causing system instability.
Corrupted or Missing DLLs
- Corrupted DLLs: Over time, DLLs used by the RUNDLL32 process may become corrupted due to software conflicts, hardware issues, or other factors. Corrupted DLLs can trigger errors when accessed by RUNDLL32.
- Missing DLLs: If a required DLL is missing from your system, RUNDLL32 may encounter issues when attempting to execute the functions associated with that DLL.
Startup Entries
- Startup Programs: Entries in your system’s startup configuration that reference RUNDLL32 may cause issues. These entries can lead to RUNDLL32 errors during system boot.
Registry Errors
- Registry Issues: Errors or corruption in the Windows Registry can impact the proper functioning of RUNDLL32 and associated DLLs.
How To Fix ‘Windows Host Process RUNDLL32’
Method 1: Turning off Task Scheduler Features
If you’re having issues soon after installing Windows 10, it’s possible that the rundll32.exe process is using excessive amounts of system resources (CPU and disc space).
Although this was the case for the vast majority of customers, you can always revert the adjustments by using the same procedure.
- To find administrative tools, open the search box by pressing Windows + S. Launch the programme that best fits the situation.
- Explore the dock and select “Task Scheduler.”
- Now, use the window’s left sidebar to go to the following file path.
Task Scheduler Library > Microsoft > Windows > Customer Experience Improvement
- There are three events on the right side of this agenda. To access the settings for the “Consolidator,” click on it. Go to the tab labelled “Triggers.” You’ll find a trigger that periodically activates the service here. Select “Edit” by clicking on it.
- When you access the trigger’s attributes, scroll down to the bottom and deselect “Enabled.” Save your work and leave the editor by clicking the Ok button.
- Let’s circle back to the list for a moment. Simply right-click each one, and choose “Disable” from the menu. The products are known as:
Consolidator
KernelCeip Task
UsbCeip
- After closing the scheduler and restarting the computer, check to see whether the problem persists.
Method 2: Turning off Telemetry Capabilities
You are participating in Microsoft’s user experience programme, which includes collecting data to be compared to PCs. This will help find any inconsistencies or adjustments, which may be used to enhance the service in the future.
Furthermore, there have been reports of issues with excessive disc and CPU utilisation due to this function. To see if the issue still exists after its removal, we can attempt that.
- To access the Run command, use the Windows key plus R. In the resulting box, type “services.msc” and hit Enter.
- Click “Services” and then “Connected User Experience” to bring up its respective menus. To access its preferences, simply double-click it.
- Locate the “Stop” button below the “Service Status” heading. Click “Startup type,” and then click the “Disabled” button. When you are through making adjustments, select Ok and then close.
- If the issue still persists after a restart, contact technical support.
Method 3: Change The Name of The Sienv.DLL File.
The Application Experience Inventory in Windows uses a library file called aienv.dll. This process is not part of the operating system and instead comes from an application you have on your machine.
Several consumers said that their disk/CPU consumption problem was resolved once they either stopped the service or renamed it. Let’s give it a shot, too. If you want to use this method, do so at your own risk; just in case something goes wrong, you can always roll back your changes using a Windows restore point.
- Launch Windows Explorer and go to this location:
C:\Windows\System32
Direct access to the location is also possible by copying the preceding address, selecting Windows + R, pasting the address into the box that appears, and then pressing Enter.
- Find the “aeinv.dll” file once you’ve entered the directory. The search box in the upper right corner of the screen can also be useful.
- Finding the file, you may then rename it by using the appropriate menu option. Transform it into oldaeinv.dll. To rename this file in Windows, you may need administrator privileges. If you are an administrator, log in as such before clicking “Continue.”
- Changing the file’s owner can help if you’re still having trouble changing it. You will then have the legal right to change its name or other identifying features.
- It’s best to examine disc and CPU utilisation after restarting the machine after renaming it.
Method 4: Eliminating Google App Engine
The Google App Engine provides a platform for creating and hosting web apps in Google-managed data centres. This programme allows websites to automatically expand to accommodate an increasing number of users.
It’s compatible with a wide variety of languages, including Java, Ruby, Python, and others that run on the Java Virtual Machine (JVM).
Numerous users complained that after installing Google App Engine, disc and CPU utilisation spiked drastically due to the rundll32.exe process. If the issue still exists after removing the programme, contact support.
- To open the Control Panel, use the Windows key + R, then type the word “control” into the box that appears, and hit Enter.
- Under the “Programs” header in the control panel, click the option to “Uninstall a software.”
- To remove Google App Engine, simply right-click it and choose the corresponding option.
- After you’ve finished uninstalling, reboot the computer to see if the issue has been resolved. If it didn’t, and you’re still experiencing excessive CPU or disc utilisation, reinstalling the software is an option.
Read Also:
Conclusion
The Windows Host Process RUNDLL32 may appear enigmatic at first, but it plays a pivotal role in the smooth operation of your Windows operating system.
When issues related to RUNDLL32 arise, it’s essential to take action promptly to ensure system stability and security.
By understanding the potential causes of RUNDLL32 issues and employing effective methods for resolution, you can maintain a reliable and efficient Windows environment.
So, the next time you encounter a RUNDLL32 error, approach it with confidence, armed with the knowledge to diagnose and resolve the issue effectively.


