Microsoft Excel, the quintessential spreadsheet software, is revered for its comprehensive features that cater to a wide range of data management and analysis needs. However, users occasionally face the perplexing issue of Excel not recognizing dates.
This article delves into the root causes of this problem and provides a detailed, step-by-step guide to resolving it, ensuring your dates are correctly interpreted and utilized in Excel.
Understanding the “Excel Not Recognizing Date” Issue
When Excel fails to recognize input as a date, it treats the data as text instead. This misinterpretation prevents you from performing date-specific operations, such as sorting, formatting, or using date functions. Recognizing and fixing this issue is crucial for accurate data analysis and reporting.
Causes of Excel Not Recognizing Date Issue
Several factors can lead to Excel interpreting dates as text:
- Locale and Date Format Mismatch: Excel’s date recognition depends on your system’s locale settings. A date format not matching the locale setting (e.g., using US mm/dd/yyyy in a UK dd/mm/yyyy setting) can cause confusion.
- Leading Spaces or Characters: Sometimes, dates imported from other sources might include leading spaces or non-date characters, leading Excel to treat them as text.
- Inconsistent Date Formats: Mixing different date formats in a single column can result in Excel failing to recognize some dates.
- Cell Formatting: If a cell is formatted as text before entering a date, Excel will not automatically convert it to a date format.
Step-by-Step Methods to Fix Excel Not Recognizing Date Issue
Method 1: Use Excel’s Convert Function
- Select the Data: Highlight the cells with dates that Excel is not recognizing.
- Open the Data Tab: Click on the ‘Data’ tab in the ribbon.
- Text to Columns: Click on ‘Text to Columns’ wizard.
- Choose ‘Delimited’: Click ‘Next’, uncheck all delimiters, and click ‘Next’ again.
- Set Column Data Format to Date: Select the ‘Date’ format and choose the correct format based on your data (e.g., DMY, MDY).
- Finish: Click ‘Finish’. Excel will convert the text to dates according to the specified format.
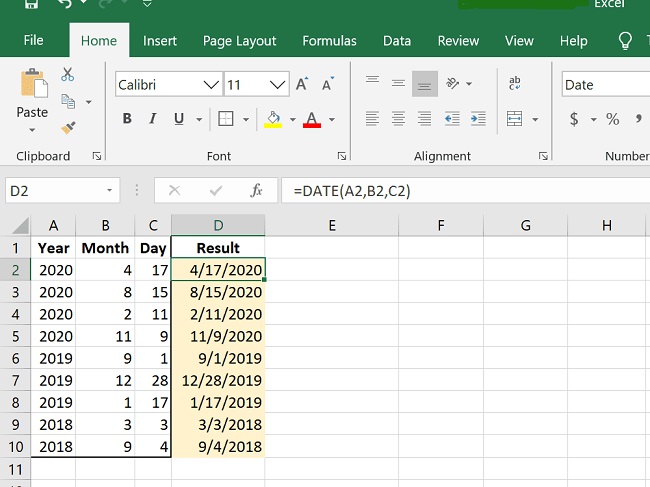
Method 2: Use Formula to Convert Text to Date
If Excel doesn’t recognize a date because it’s formatted as text, you can use formulas to convert it:
- DATEVALUE Function: If your date is in a recognizable format, use
=DATEVALUE(text_date)to convert it to a date. - Using DATE Function: For more complex conversions or non-standard formats, use the
DATE(year, month, day)function to create dates from separate values.
Example:
=DATE(RIGHT(A1, 4), MID(A1, 4, 2), LEFT(A1, 2))
This formula assumes a date in the format ‘ddmmyyyy’ and converts it to a recognizable date format by Excel.
Method 3: Change Locale Settings
If the issue is due to a locale mismatch:
- Open Control Panel: Navigate to ‘Clock and Region’.
- Change Date, Time, or Number Formats: Select ‘Region’, then go to the ‘Formats’ tab.
- Adjust Format: Choose the format matching your date data, and apply the changes.
Forcing Excel to Recognize a Date
To force Excel to recognize an input as a date, ensure your data matches the system’s locale settings or use the ‘Text to Columns’ feature to explicitly convert text to date format.
Converting Text to Date in Excel
Beyond the aforementioned methods, Excel offers functions such as TEXT to reformat dates:
=TEXT(A1, "dd/mm/yyyy")
This function converts a date in cell A1 to the specified format, ensuring Excel treats it as a date.
Using CMD to Fix Date Recognition in CSV Files
Before importing CSV files into Excel, ensuring dates are in a recognizable format can prevent issues. Use a command line script to preprocess CSV files, replacing date formats using tools like sed or awk in Unix-like systems.
Example using sed:
sed -i 's/\([0-9]\{2\}\)\/\([0-9]\{2\}\)\/\([0-9]\{4\}\)/\3-\2-\1/g' yourfile.csv
This example changes dates from dd/mm/yyyy to yyyy-mm-dd format, which is universally recognized by Excel.
Leveraging Power Query for Date Conversion
Power Query is an Excel tool that can transform data, including changing text to dates. This method is especially useful for large datasets:
- Import Data Using Power Query: Go to the ‘Data’ tab and select ‘Get Data’. Choose your data source and load the data into Power Query Editor.
- Change Column Type: Right-click the column with the date issue, select ‘Change Type’ > ‘Using Locale…’, choose ‘Date’ as the new type, and select the correct locale matching your date format.
- Apply Changes: Click ‘Close & Load’ to apply your changes and import the data back into Excel.
This method is particularly effective for datasets with consistent but non-standard date formats that Excel’s default functionality struggles to recognize.
Formatting Cells Preemptively
To avoid Excel treating your dates as text, format the cells as Date before inputting or importing your data:
- Select the Cells: Highlight the cells or column where you will enter or paste dates.
- Format Cells: Right-click the selection, choose ‘Format Cells’, then select ‘Date’ and choose the appropriate format from the list.
By preemptively formatting cells, Excel is more likely to correctly interpret and display date information.
Utilizing Dynamic Array Formulas
For Excel versions that support dynamic array formulas, you can streamline the conversion of text to dates across multiple cells. Suppose your dates in text format are in column A, starting from A1:
=ARRAYFORMULA(VALUE(TEXT(A1:A, "yyyy-mm-dd")))
This formula attempts to convert a range of text entries into date values, assuming the text entries are in a recognizable date format. Adjust the “yyyy-mm-dd” part of the formula to match the format of your dates.
Advanced Troubleshooting: Using Excel VBA
For those comfortable with Excel’s VBA (Visual Basic for Applications), creating a macro can automate the process of converting text to dates:
- Open VBA Editor: Press
Alt + F11to open the VBA Editor. - Insert a New Module: Go to ‘Insert’ > ‘Module’ to add a new module.
- VBA Code for Converting Text to Date:
Sub ConvertTextToDate() Dim rng As Range
For Each rng In Selection
rng.Value = DateValue(rng.Text)
Next rng
End Sub
- Run the Macro: After selecting the cells with text-formatted dates, run this macro to convert them into actual date values.
This method is powerful but should be used with caution, as macros can change your data irreversibly.
Best Practices for Managing Dates in Excel
To minimize issues with dates in Excel, consider the following best practices:
- Consistent Formats: When importing data, ensure that date formats are consistent throughout the dataset.
- Check Locale Settings: Verify that your system’s locale settings match the date format of your data.
- Use Data Validation: To ensure data integrity, use Excel’s data validation feature to restrict input to valid dates.
- Educate Team Members: If you work in a team, ensure all members are aware of the importance of consistent date formats and how to input dates correctly.
Conclusion
Excel not recognizing dates can disrupt data management and analysis, but with the right approaches, this issue can be easily resolved. Whether through Excel’s built-in features, formulae, or external preprocessing, ensuring your dates are correctly interpreted opens the door to powerful date-based functionalities in Excel.
Remember, consistency in date formats and understanding Excel’s locale settings are key to seamless date handling in your spreadsheets.
Frequently Asked Questions (FAQs) about Excel Not Recognizing Dates
Q1: Why does Excel sometimes treat dates as text?
A: Excel may treat dates as text due to locale and format mismatches, leading spaces or characters in the data, inconsistent date formats within the same column, or because the cell was formatted as text prior to inputting dates.
Q2: How can I quickly convert a column of text-formatted dates to actual dates?
A: The fastest method is using Excel’s “Text to Columns” wizard, found under the Data tab. This tool allows you to specify the format of your dates during the conversion process.
Q3: What formula can I use to convert a text date in an unrecognized format to a date?
A: You can use the DATEVALUE function if the date is in a format Excel recognizes. For more complex conversions, combining the DATE, MID, LEFT, and RIGHT functions to extract parts of the date can be effective.
Q4: Can I force Excel to recognize dates without changing the system’s locale settings?
A: Yes, you can force Excel to recognize dates by using the “Text to Columns” feature with the correct date format selected, or by using formulas to manually convert text to dates according to your specific format.
Q5: How do I prevent Excel from treating dates as text in the future?
A: Ensure your data’s date format matches your system’s locale settings, format cells as dates before inputting or pasting data, and avoid mixing date formats in the same column.
Q6: How can I use Power Query to fix date recognition issues?
A: Import your data into Power Query, select the column with the date issue, right-click, choose “Change Type” > “Using Locale…”, then select “Date” as the type and the appropriate locale that matches your data’s date format.
Q7: What should I do if my dates are still not recognized after trying these methods?
A: Double-check the format of your dates and ensure there are no hidden characters. If issues persist, consider using Excel’s VBA to create a custom script for converting text to dates.
Q8: Can Excel recognize dates in formats other than the standard mm/dd/yyyy or dd/mm/yyyy?
A: Yes, Excel can recognize a variety of date formats, but it relies heavily on the system’s locale settings. Using the “Text to Columns” feature or specific formulas can help Excel recognize and convert non-standard date formats.
Q9: Is there a way to batch convert multiple text date formats within the same Excel sheet?
A: The “Text to Columns” wizard is useful for columns with a consistent format. For columns with multiple formats, you might need to use a combination of formulas or process the data in segments based on each format.
Q10: How do I change Excel’s default date format?
A: Excel’s default date format is based on the system’s locale settings. To change it, you’ll need to modify the regional settings in the Control Panel (Windows) or System Preferences (Mac).


